¶ Plugin for WordPress
The WebTotem Security plugin is the WordPress plugin that prevents attacks and malware.
¶ Installing the plugin
- Navigate to the admin console of your WordPress site
- Go to the “Plugins” section
- Select “Add New”
- Search for “WebTotem Security” or download the plugin here
- Go to the “Installed Plugins” section
- Click on the “Activate” button
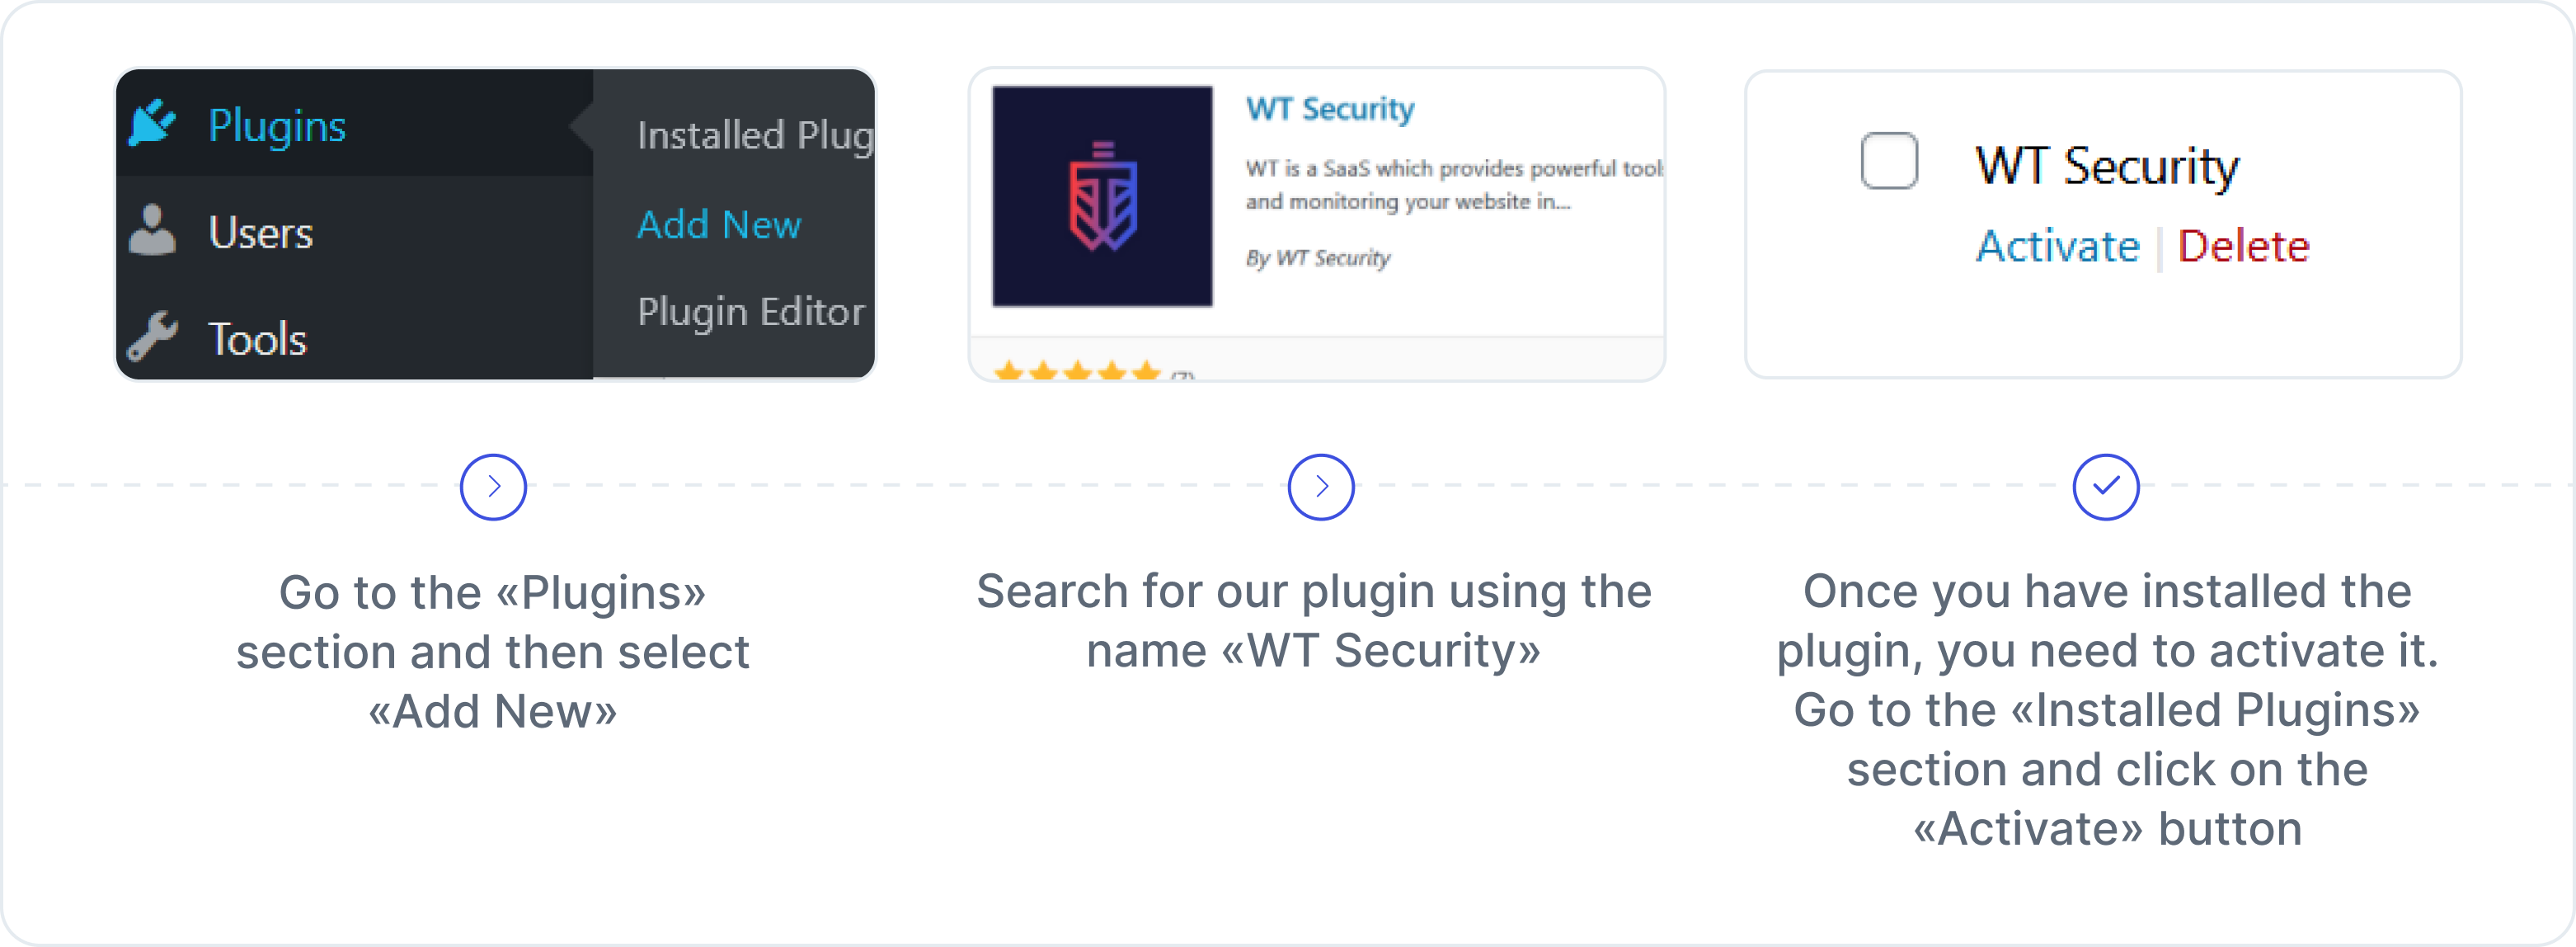
For manual installation of the plugin, refer to the manual installation guide.
¶ Activating the plugin
- Navigate to the admin console of your WordPress site
- Go to the “WebTotem” section
- Select “Log In”
- Generate an API key in your account
- Use the API key to activate the plugin
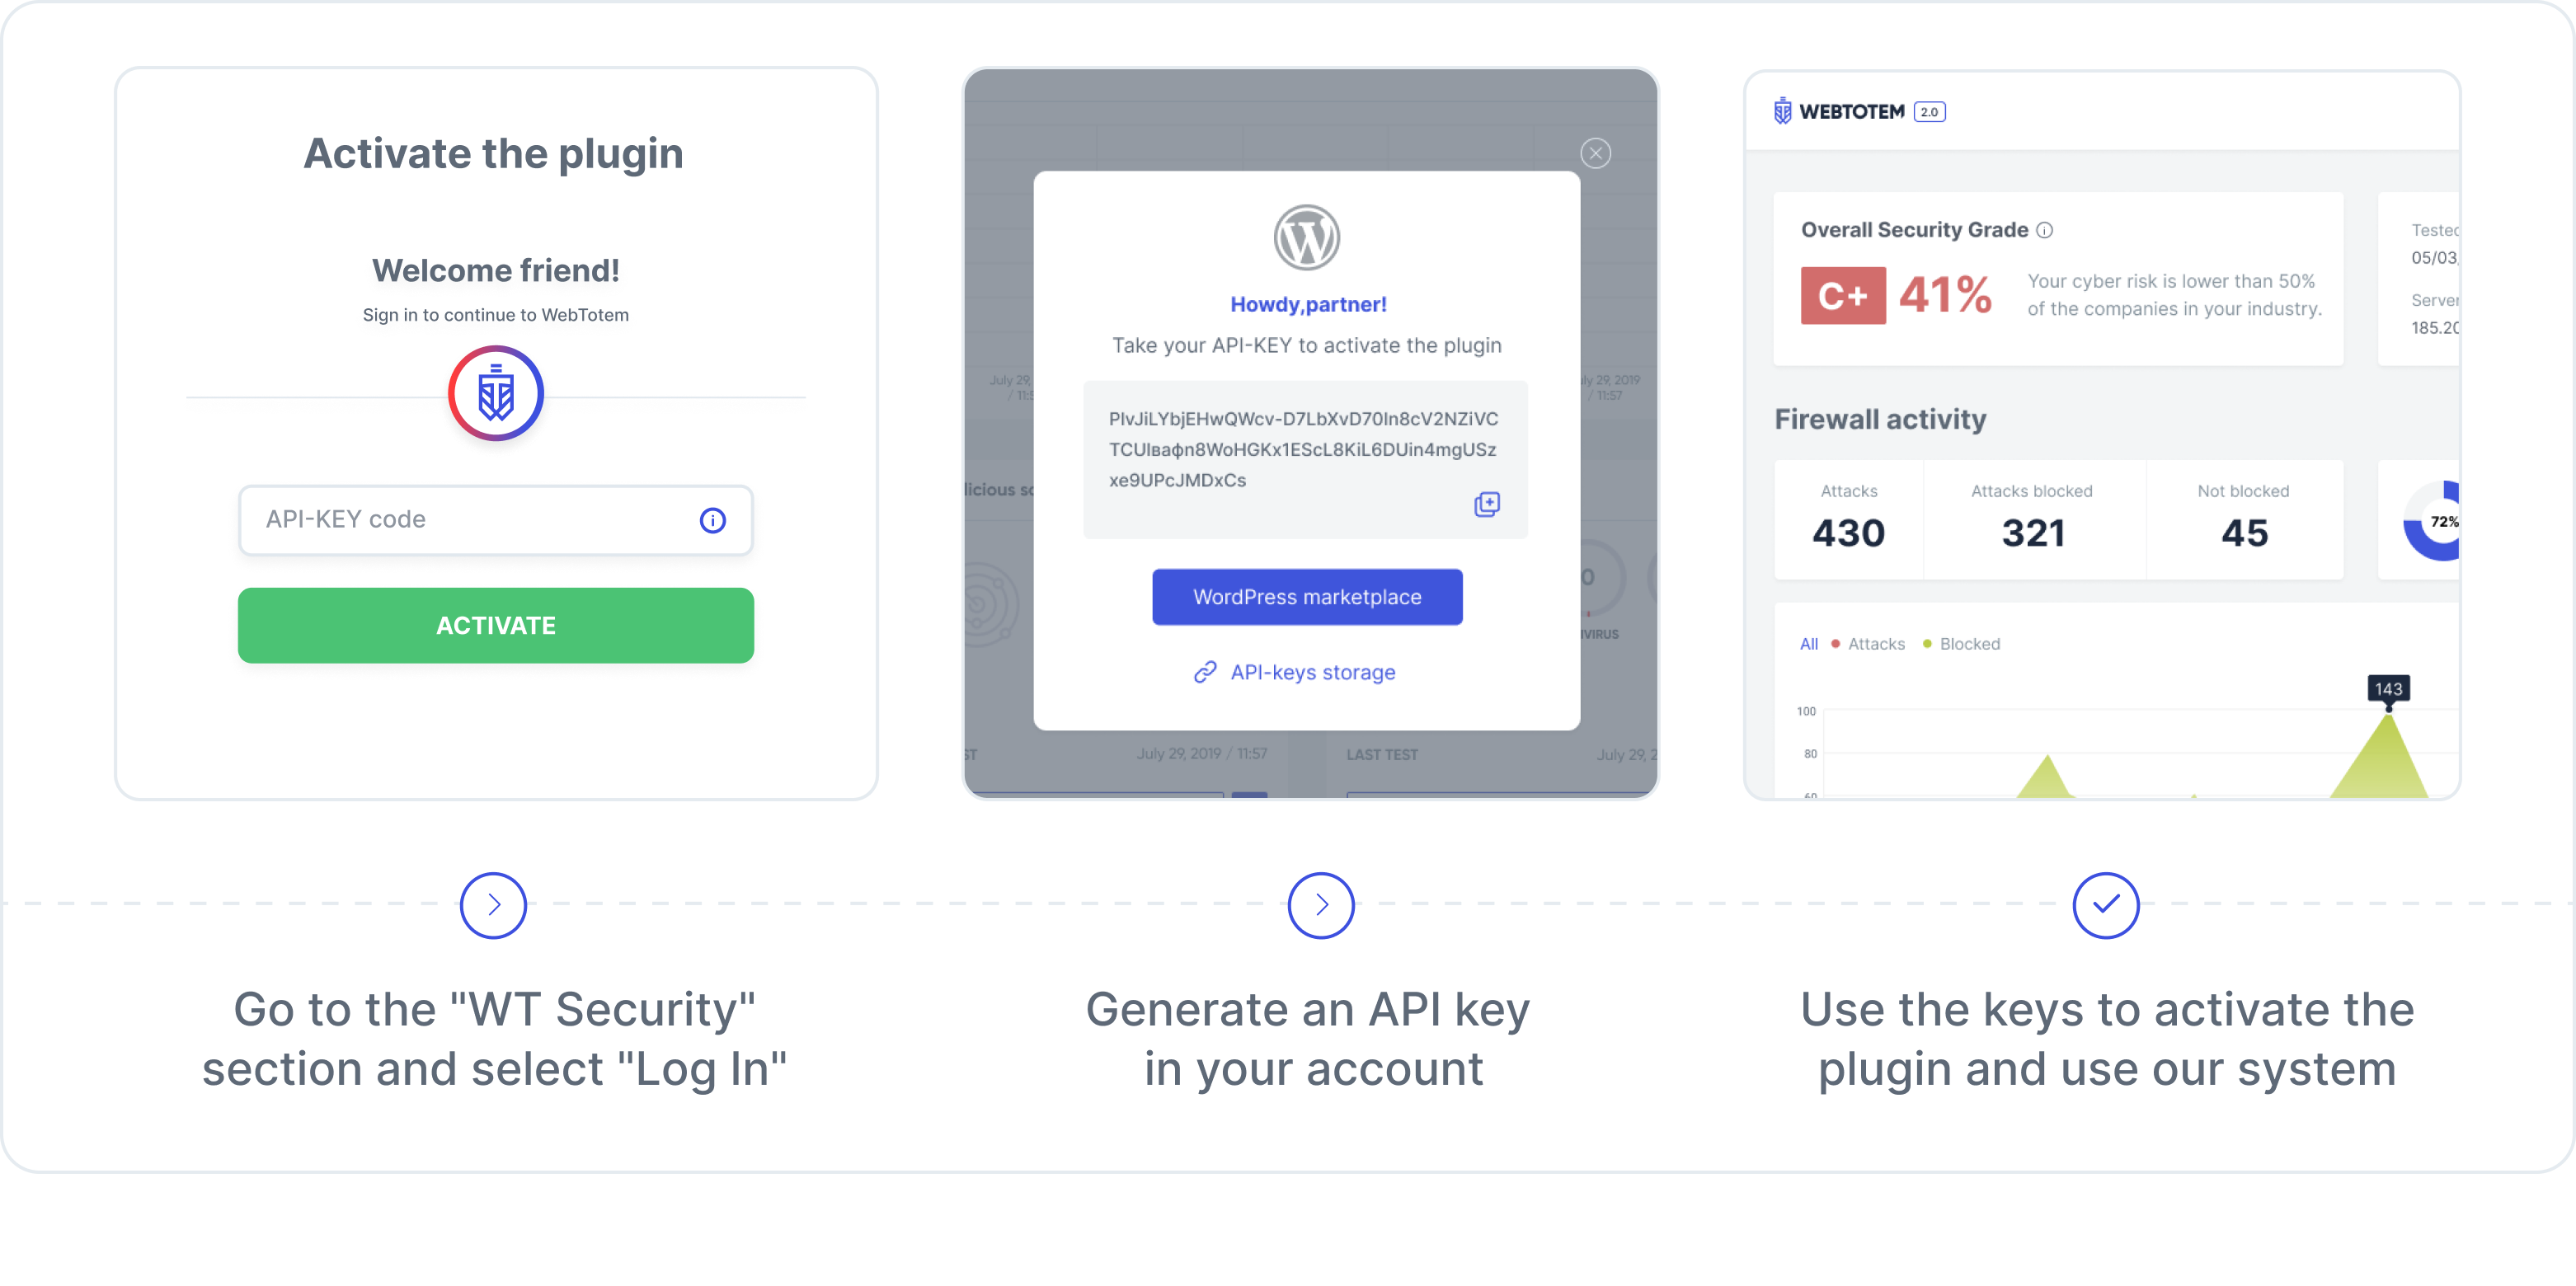
When you press the “Activate” button, you will be redirected to a page with information about your website, and the agent installation process will begin automatically.


¶ Main Elements of the Plugin
¶ Top menu

For convenience during day and night usage, the interface includes a theme switch.
¶ Dashboard page

On the "Dashboard" page, you can get data on the following:
- Summary information on the Firewall and Antivirus modules (described in detail on the separate pages)
- Server Resources tracks different characteristics of your server, such as Random Access Memory and CPU Load Average
- SSL Scanner: keeps you informed about SSL certificate updates
- Port Scanner: informs you about the state of open TCP/UDP ports on the server, where your website is hosted. Also, it tells you about the new port opening
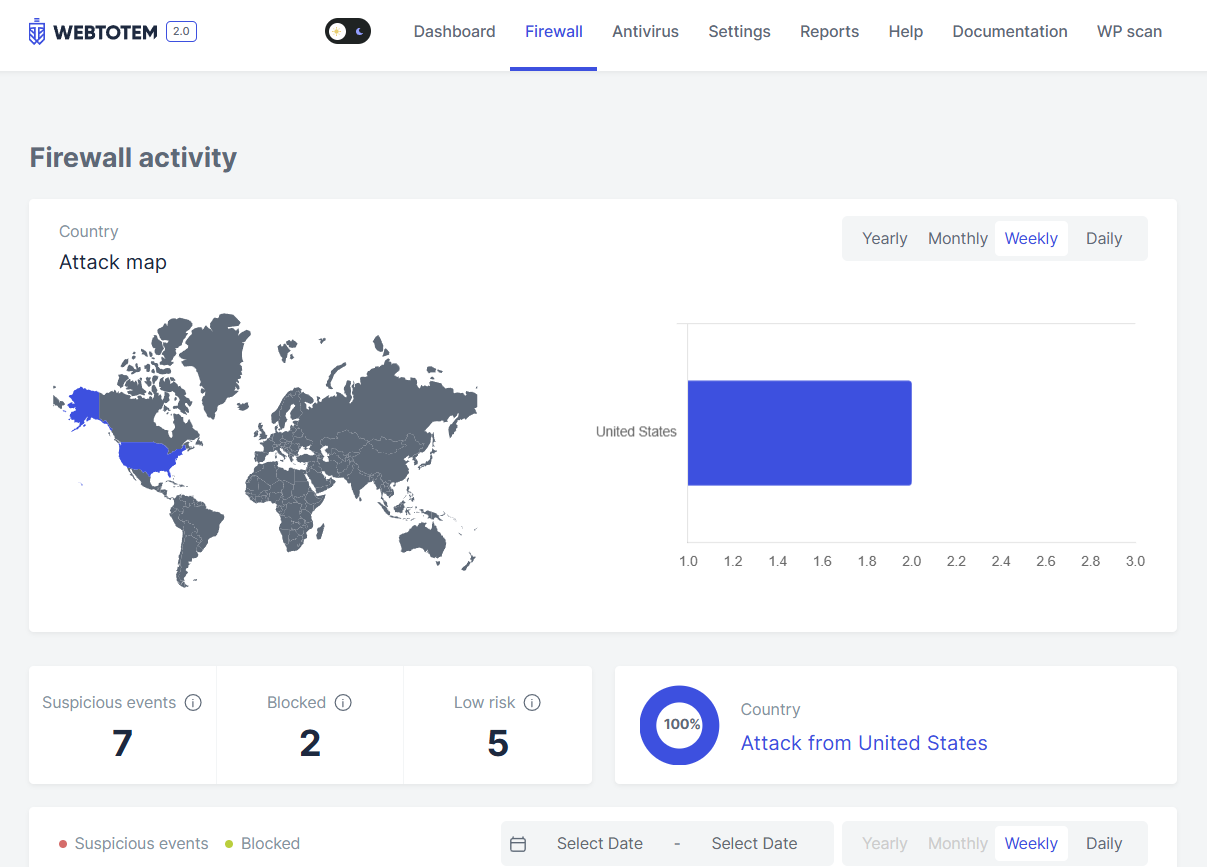
¶ Firewall page
The "Firewall" page displays all data related to attacks on the site.
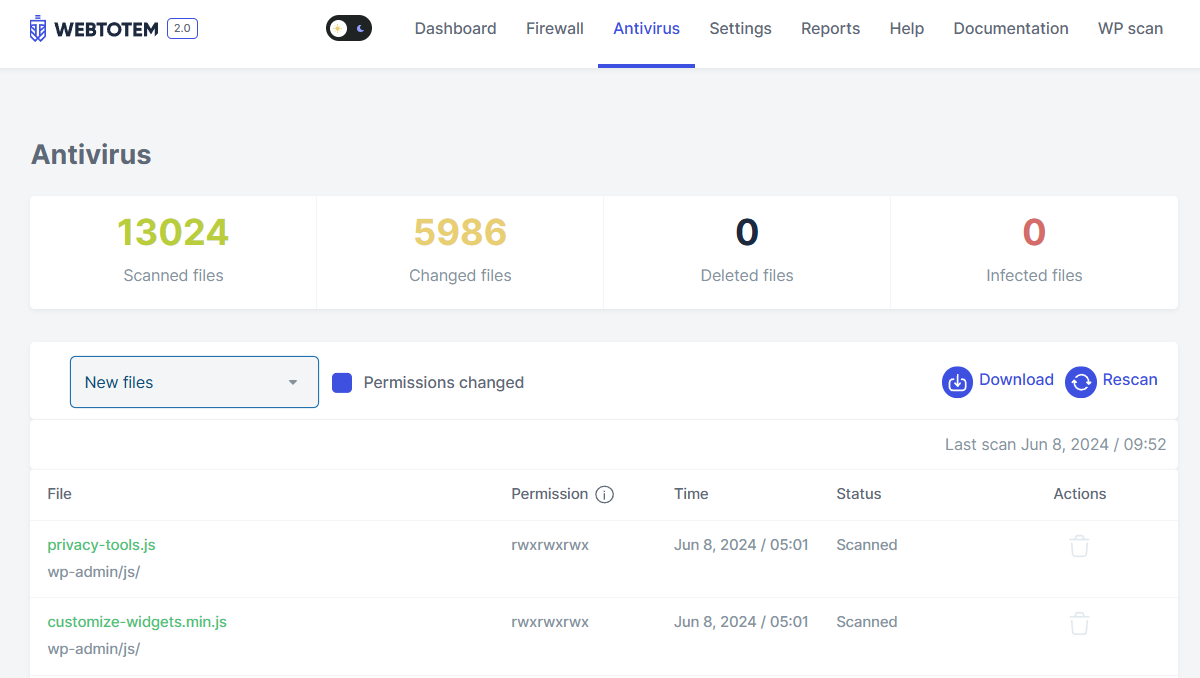
¶ Antivirus page
The "Antivirus" page allows you to view data on scanned site files and download reports.
¶ Settings page
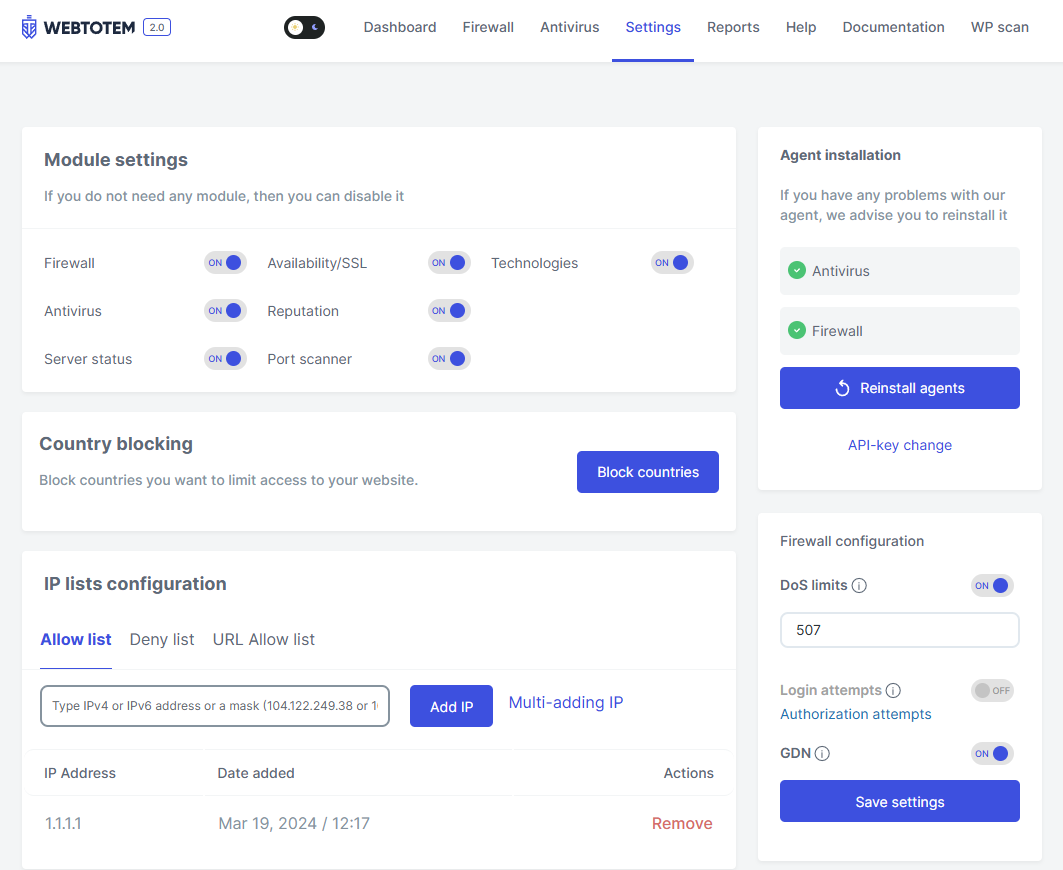
In the “Settings” page, you can view and adjust settings for the following:
- Module Settings
- Agent installation
- Firewall configuration
- Country blocking
- IP lists configuration
- Notifications
- ReCaptcha
- Authorization attempts
- Two-Factor Authentication
- Hide WP version
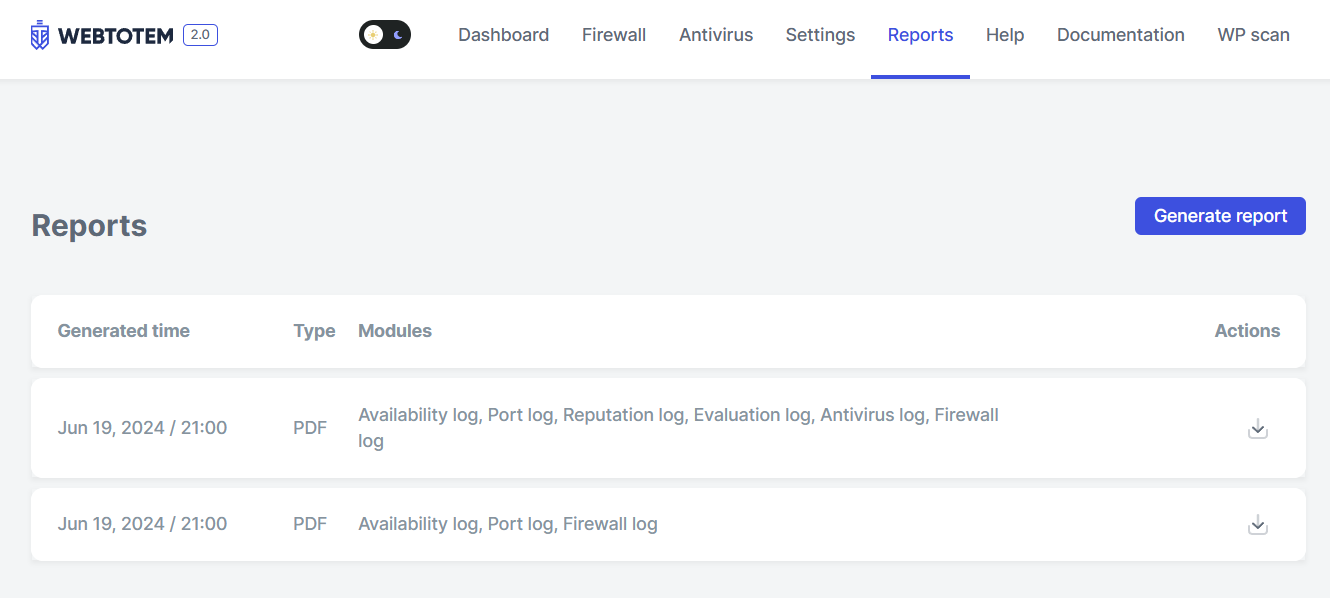
¶ Reports page
On the “Reports” page, you can generate reports on selected modules and download the created reports.
¶ Help page
Clicking “Help” will navigate you to our Frequently Asked Questions (FAQ) page, where you can chat with support.
¶ Documentation page
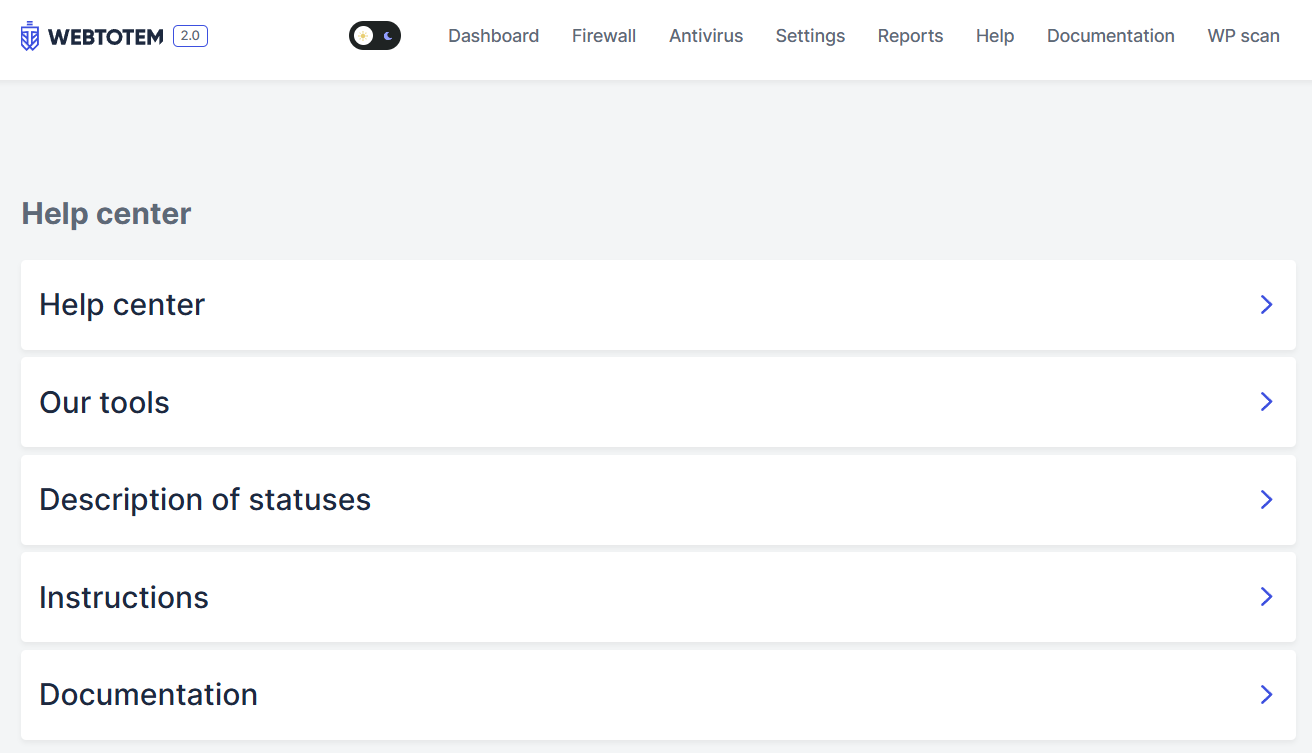
The “Documentation” page provides links to the plugin documentation and its modules.