¶ Allow / Deny lists
¶ IP allow/deny lists
With this feature, you can allow or deny access to your website from specific IP addresses. This measure is required for custom control of the Web Application Firewall (WAF) rules. If you disagree with this feature or encounter a blocking message, it indicates that the measure is in effect.
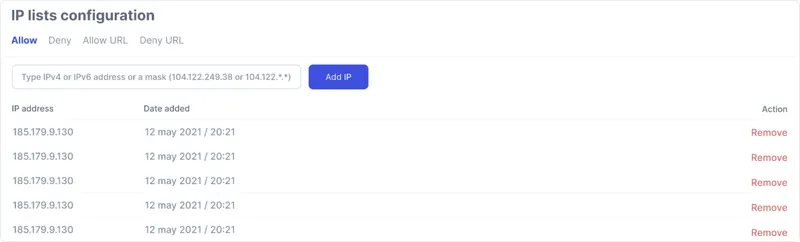
¶ How to add / remove an IP address
- Navigate to the “Firewall” page
- Press the settings button located in the top-right corner of the attack logs window
- Select the relevant list (allow or deny) and enter the IP address you wish to allow or deny access to
- Alternatively, you can press the plus button in the attack logs to whitelist the IP address automatically
Please note that changes usually take up to 15 minutes to take effect.
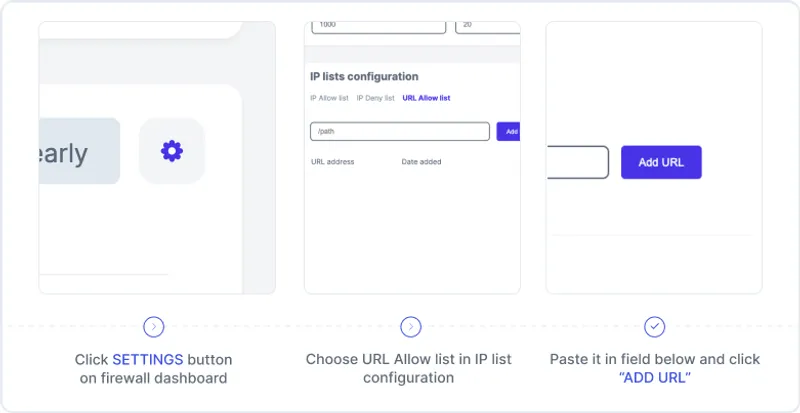
¶ URL Allow list
If you receive a WebTotem blocking message or if WebTotem prevents you from using your website or additional plugins/services, you can whitelist these pages in the WebTotem Firewall settings to resolve the issue.
- Copy the exact URL from the attack log description (from the "Attack location" column), excluding the command GET/POST at the beginning and HTTP/1.1 at the end
- Add the URL to the URL allowlist in the firewall settings

¶ Global rule
If you want to set a global rule and exclude the blocking of requests containing a common path, such as /admin/, add this path to the URL allowlist.
With the /admin/ path added to the allowlist, all requests containing /admin/ will be permitted by the WAF. For example:
/admin/editor/?page=news
It is recommended to whitelist a URL only if it needs to be accessible to all visitors. If the URL is part of the admin area of your site, it is best to whitelist your IP address instead.